
在github上部署了不少action脚本,有定时的也有手动触发的,这里记录下使用ios捷径来手动触发github action的实现。
实现步骤
1. github action脚本中添加手动触发的命令
1 | on: |
2. 开启仓库Actions权限
路径: setting-Code and automation-Actions-General-Actions permissions
3. 生成Token
这里生成,注意token的有效期和权限开启
4. 获取GitHub Actions ID
在终端运行下面命令:
1
curl https://api.github.com/repos/{owner}/{repo}}/actions/workflows --ssl-no-revoke -H "Authorization:{token}
注意替换其中的三个参数:
owner: github id
repo: 仓库名
token: 第3步里生成的token
actions里有多个脚本的注意选择对应的yml的id
响应格式如下:
1
2
3
4
5
6
7
8
9
10
11
12
13
14
15
16
17
18
19
20
21
22
23
24
25
26
27
28
29{
"total_count": 2,
"workflows": [
{
"id":********,
"node_id": "*********************",
"name": "process *********",
"path": ".github/workflows/*******.yml",
"state": "active",
"created_at": "2024-08-10T04:08:50.000Z",
"updated_at": "2024-08-10T05:44:38.000Z",
"url": "https://api.github.com/repos/******/*****/actions/workflows/**********",
"html_url": "https://github.com/****/****/blob/main/.github/workflows/****.yml",
"badge_url": "https://github.com/****/****/workflows/process****/badge.svg"
},
{
"id":********,
"node_id": "*********************",
"name": "process *********",
"path": ".github/workflows/*******.yml",
"state": "active",
"created_at": "2024-08-10T04:08:50.000Z",
"updated_at": "2024-08-10T05:44:38.000Z",
"url": "https://api.github.com/repos/******/*****/actions/workflows/**********",
"html_url": "https://github.com/****/****/blob/main/.github/workflows/****.yml",
"badge_url": "https://github.com/****/****/workflows/process****/badge.svg"
}
]
}
5. 捷径设置
url:https://api.github.com/repos/{owner}/{repo}/actions/workflows/{github action id}/dispatches
注意替换其中的参数。获取url内容: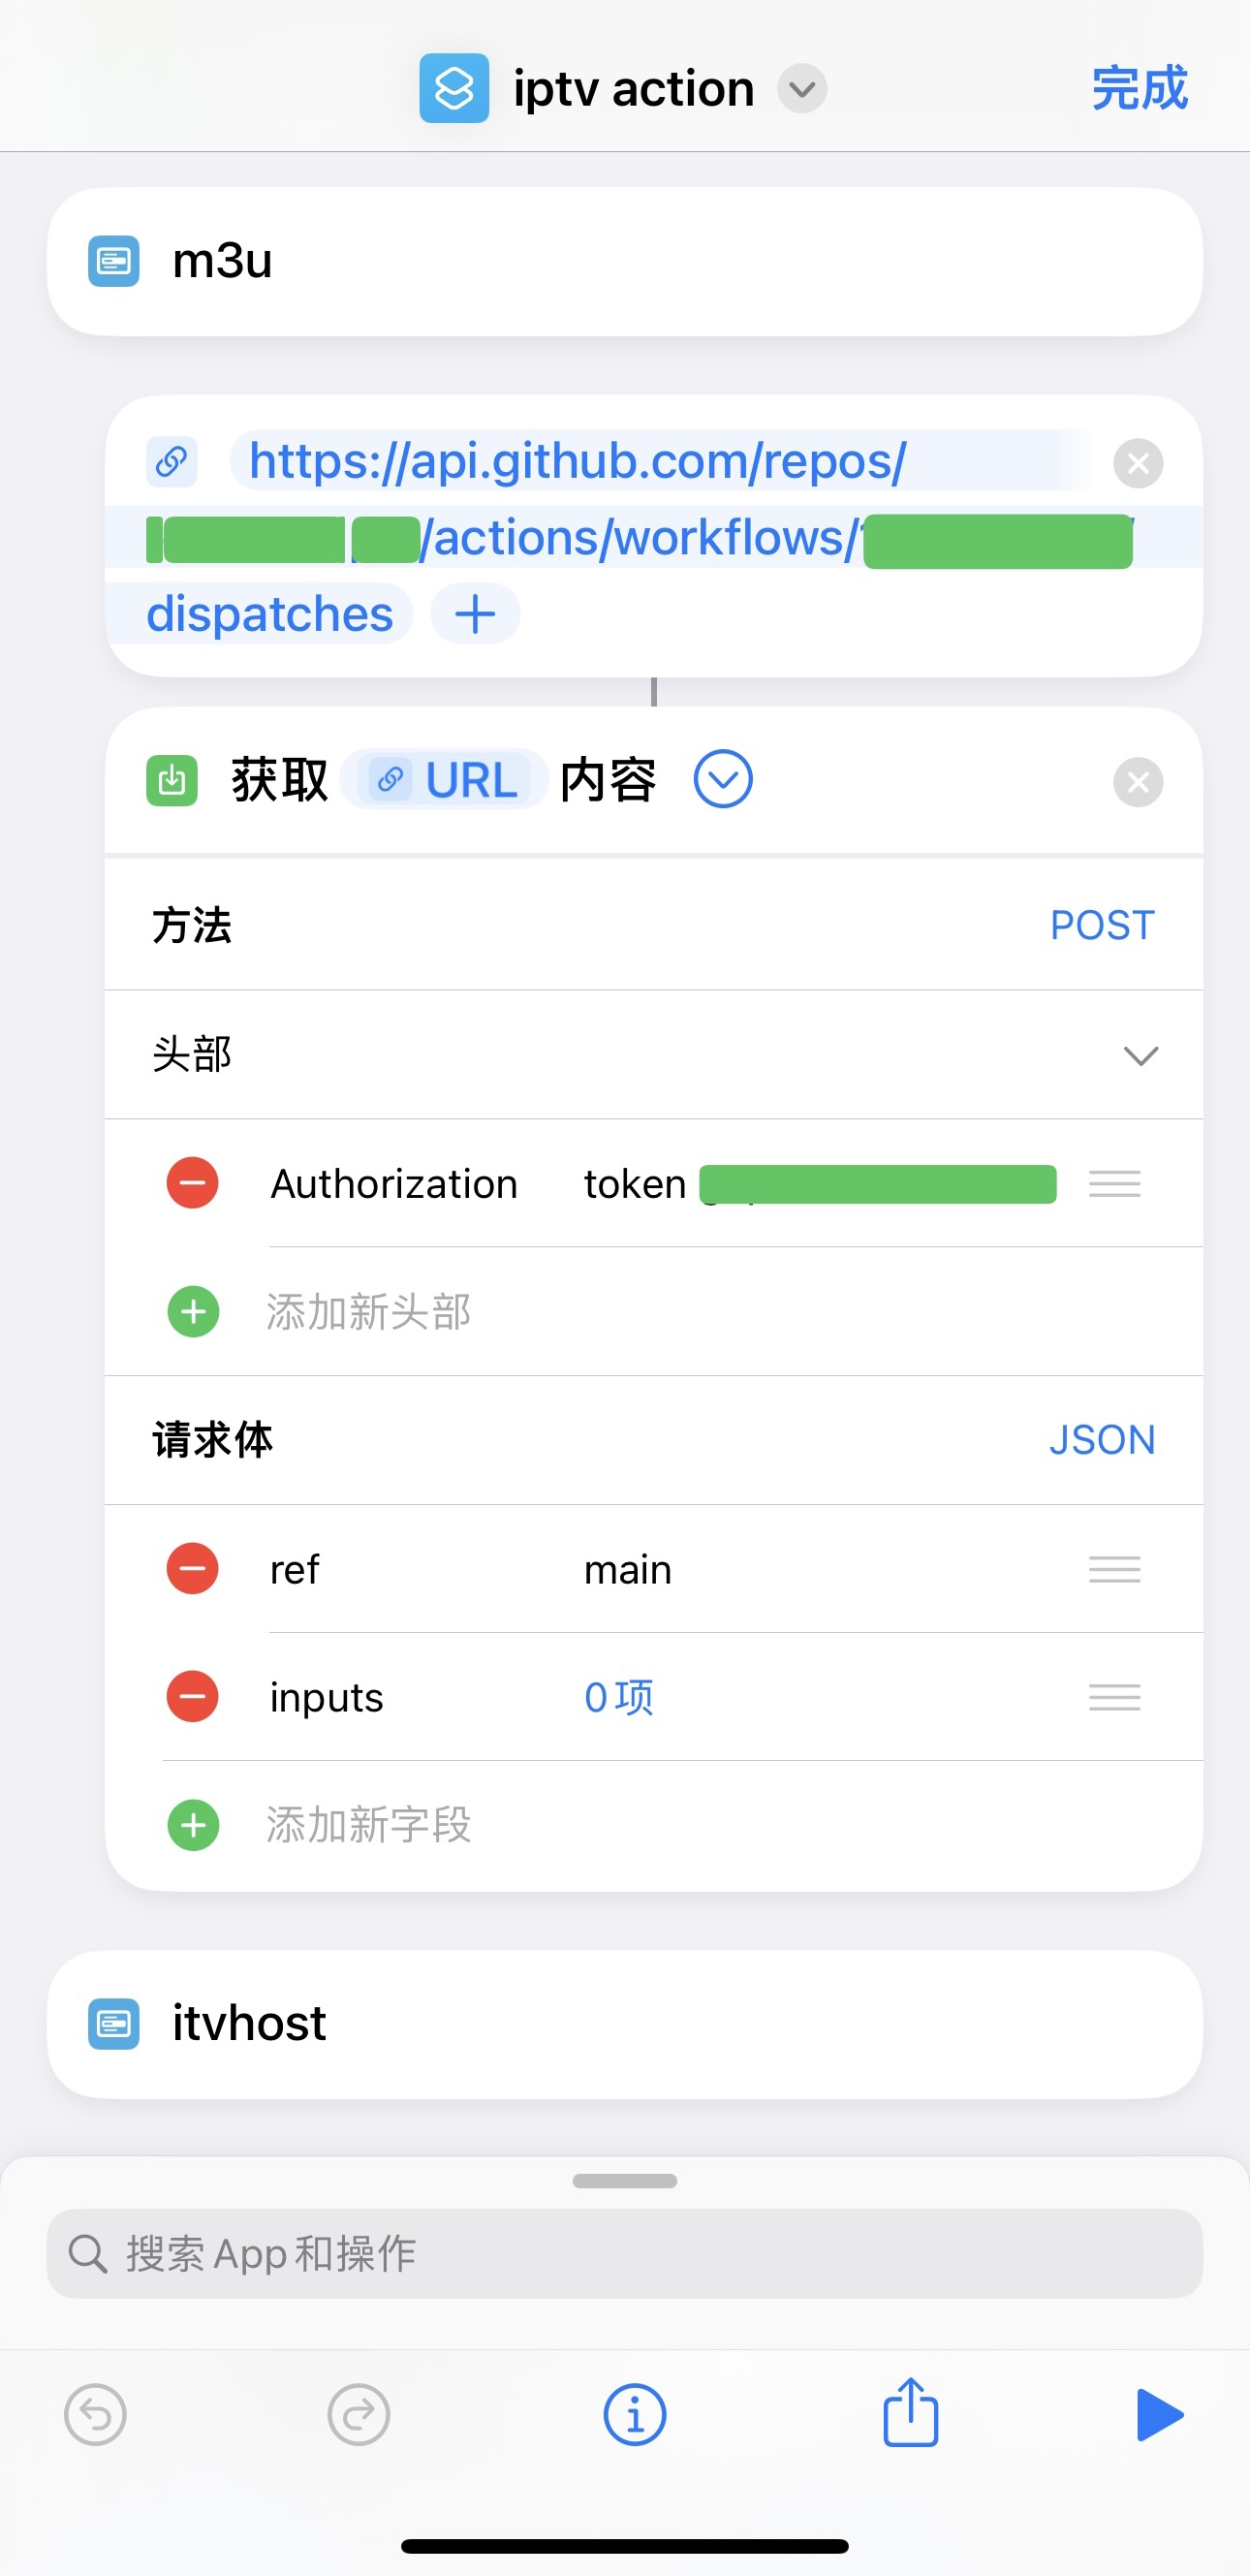
注意:input的类型为词典;Authorization的值是token {token}不是{token}!